How to take pictures
Basic principles
- The lesion must be the main thing in the picture
- Put the camera as close to the lesion as possible
- The image must be well focused
- Make sure that the lesion is what's in focus
- The image must be well lit
- Use multiple images of the same lesion
- The image must not be artificially edited or compressed
The lesion must be the main thing
To ensure that the device knows what to analyse, you must ensure that the lesion is the main element in the image.
This is what data scientists call Region of Interest, or ROI. For the condition to be properly analysed, the image must match region of interest. Otherwise, you are adding noise to input and thus potentially hindering the output.
Put the camera close to the lesion
Ask yourself: how does the device know what you want it to look at? Well, it does not know. That is why the device looks at the whole image. So the best way of ensuring that the device is analysing the right thing is capturing the lesion from as close as you can.
Now we are going to look at the same lesion, captured in two different photos:
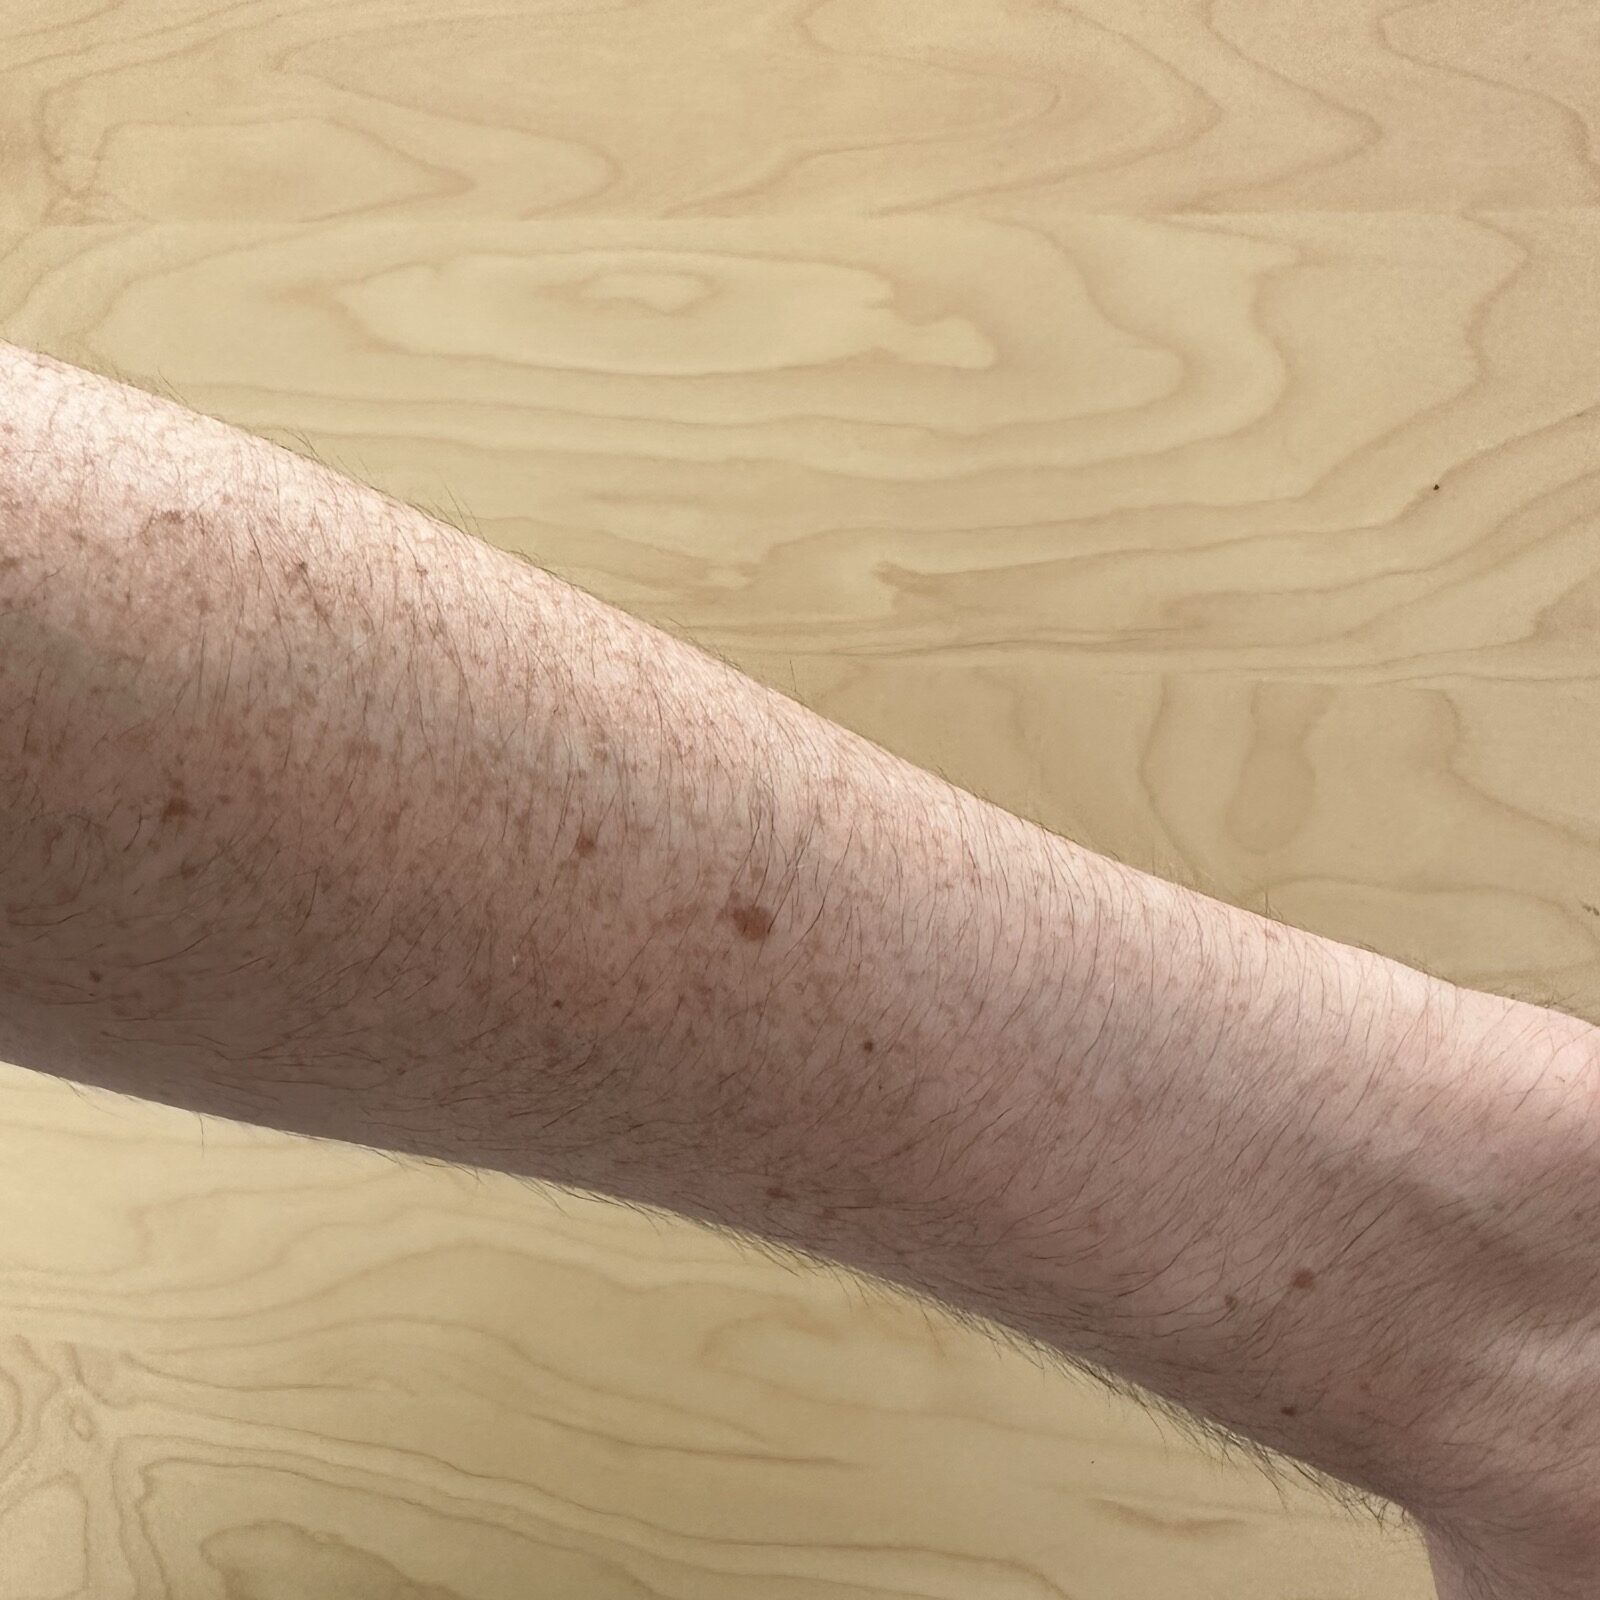
As you can see, the following image is taken from far away.
| Image | Output |
|---|---|
 | Detected conditions The device has detected the following conditions.
|
As a result, the region of interest is not the most prominent element of the image. In other words: you can barely see the lesion. Instead, you added noise to the input by capturing the background and many freckles in the arm.
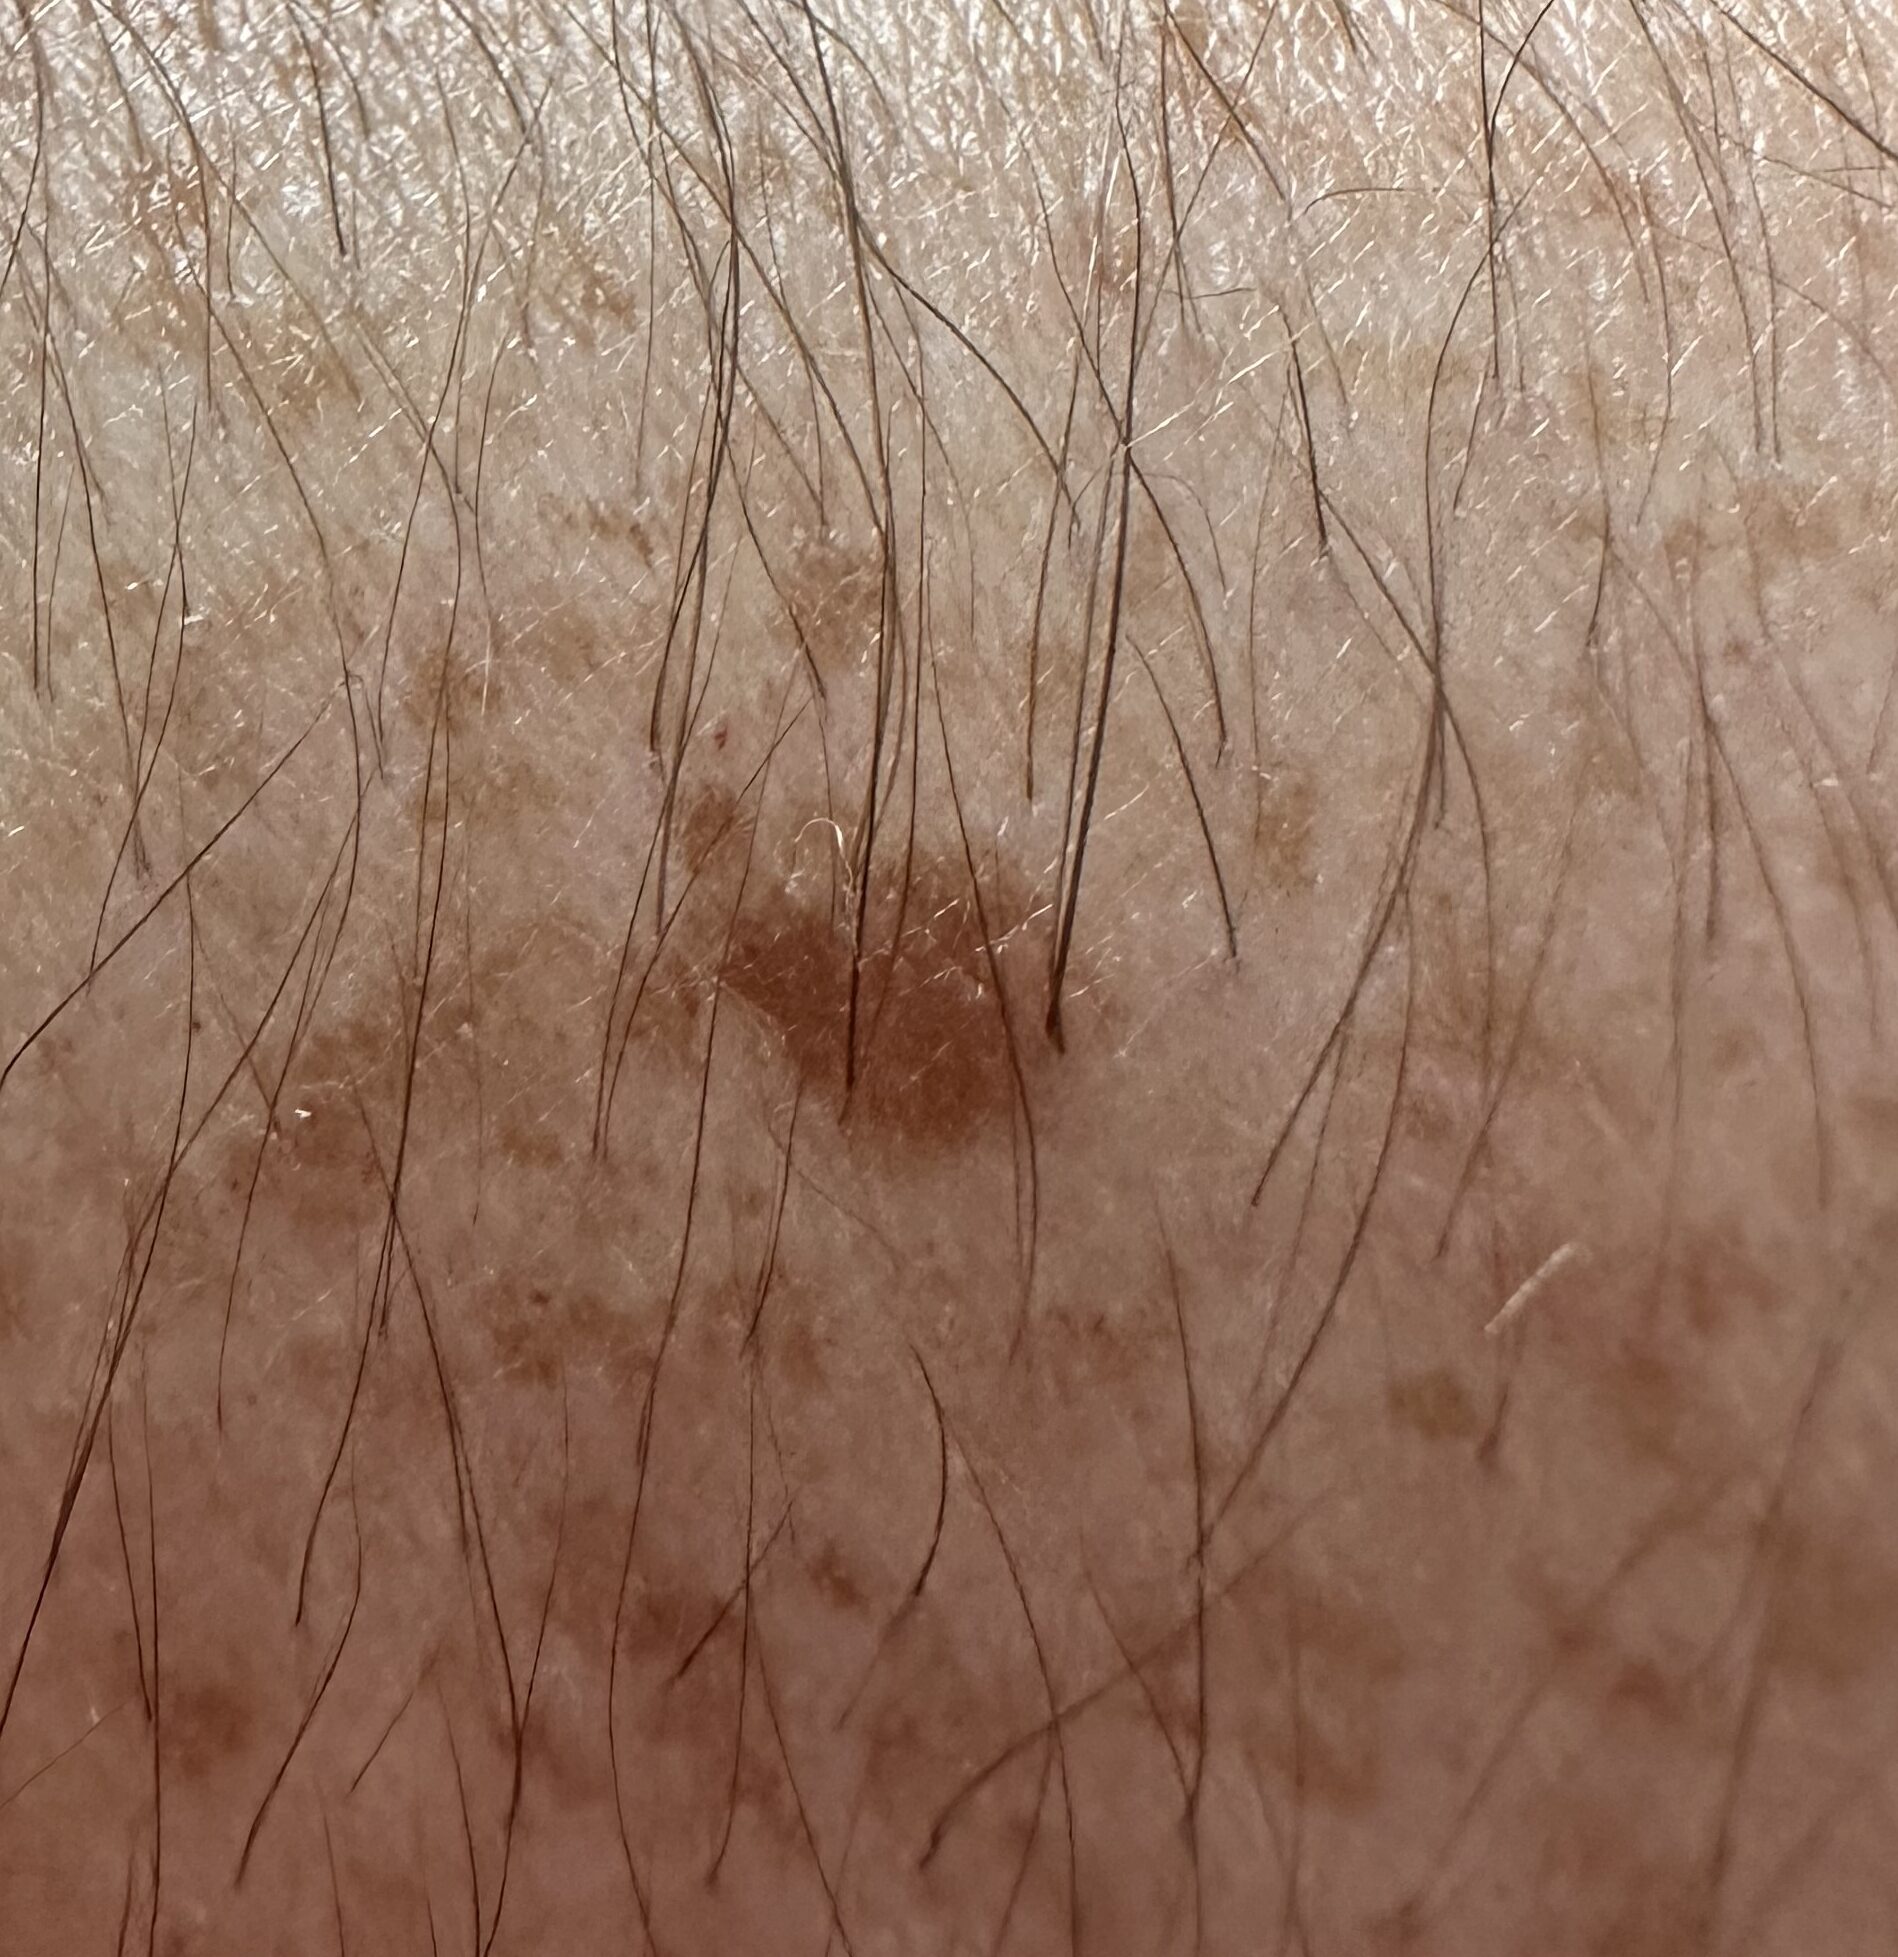
Now the same image, but with the camera closer to the lesion.
| Image | Output |
|---|---|
 | Detected conditions The device has detected the following conditions.
|
Thanks to taking the image from closer up, you cannot see the table anymore, which reduces the noise. And furthermore: the lesion occupies a significant portion of the image. As a result: the outcome of the device is much better.
Camera positioning
For optimal results:
- Angle: Hold the camera perpendicular (at a 90° angle) to the skin surface. Angled shots can distort the appearance of the lesion.
- Distance: Position the camera close enough so the lesion fills most of the frame, but far enough to maintain sharp focus (typically 10-30 cm depending on your device).
- Stability: Keep your hands steady or brace them against a stable surface to prevent motion blur.
Background considerations
- Use a neutral, uniform background when possible (solid color, no patterns)
- Avoid backgrounds with similar colors to the skin or lesion
- Ensure no objects partially obstruct the view of the lesion
- If photographing a lesion on a limb, consider placing it against a plain surface
The image must be well focused
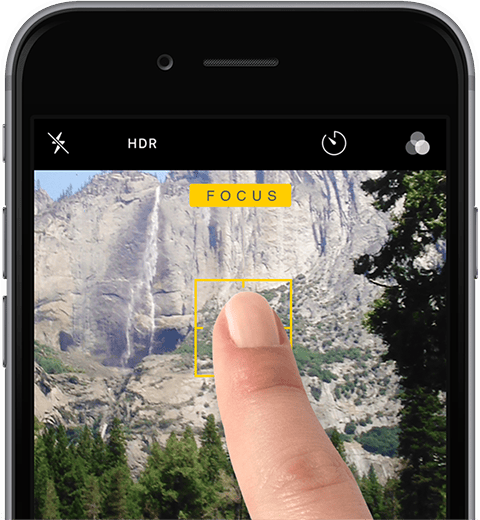
The best way of ensuring that the image is focused is by tapping on the phone screen, right on top of the region of interest.
Put the lesion in focus
Your camera allows different things to be in focus. For photos to be correctly interpreted by the device, you need the lesion to be in focus.
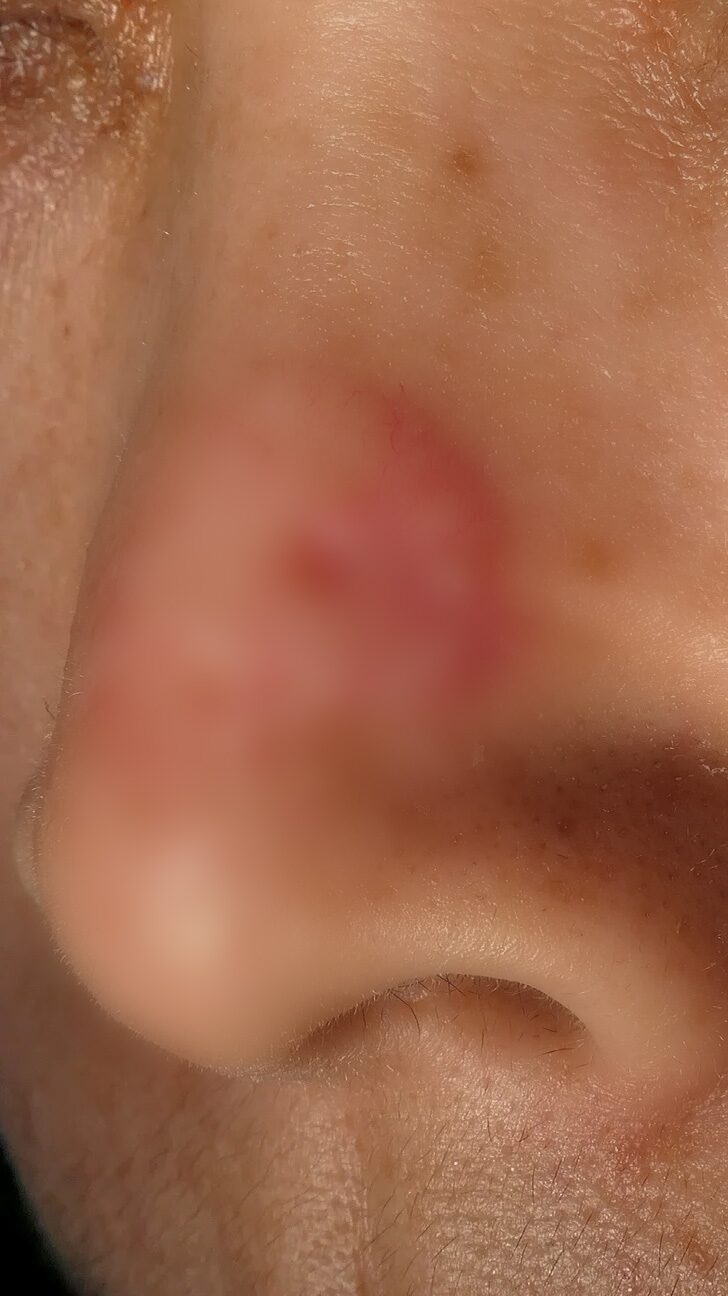
In the following image, the user focused the area behind the nose, and the nose is out of focus:
| Image | Outcome |
|---|---|
 | Detected conditions The device has detected the following conditions.
|
Due to the fact that the region of interest is out of focus, you are removing the valuable information contained in the region of interest.
Now the user focused the nose, which is the region of interest:
| Image | Outcome |
|---|---|
 | Detected conditions The device has detected the following conditions.
|
Thanks to focusing the lesion, the device has the information it needs about the lesion. As a result, because the lesion is properly focused, the outcome of the device is much better.
The image must be well lit
You must ensure that the image contains information. In other words: that the pixels reflect the features of the lesion. For that, you need to light the region of interest.
Lighting requirements
- Use adequate, even lighting that illuminates the entire lesion uniformly
- Avoid harsh shadows that obscure parts of the lesion
- Avoid direct reflections or glare on the skin surface
- Natural daylight or diffuse artificial light works best
- If lighting is insufficient, use the camera flash
The flash is such a great invention. It even helps with the focus.
Common issues to avoid
The following issues can significantly reduce the quality of the device output:
| Issue | Description | Solution |
|---|---|---|
| Motion blur | Image appears blurry due to camera or subject movement | Keep hands steady, brace against surface, or use burst mode |
| Glare/Reflections | Bright spots on skin surface that hide lesion details | Adjust lighting angle, avoid direct flash reflection |
| Harsh shadows | Dark areas that obscure part of the lesion | Use diffuse lighting, add fill light, or reposition |
| Partial obstruction | Hair, clothing, or objects blocking part of the lesion | Clear the area around the lesion before capturing |
| Poor background | Cluttered or similar-colored background causing confusion | Use neutral, contrasting background |
Use multiple images of the same lesion
To receive an output from the device, you only need to upload one image. With one image, the device works fine. However, you have the possibility of sending multiple images of the same skin structure in the same diagnostic report.
If you capture multiple images of the same skin lesion, the performance of the device will increase. Capturing multiple images of the same lesion only takes 10 extra seconds, if you follow the procedure explained in this animation:

The reason this works is that, sometimes, a particular image may have some sort of noise of artifact. By sending multiple images that are slightly different, you remove the impact of any particular artifact.
The image must not be artificially compressed
Make sure there has been no size reduction
If you download images from the Internet, or if you received the images through WhatsApp, they may have been artificially compressed or reduced.
A good way of knowing if an image has been reduced is by checking the image size. The following table shows the typical size of images from different devices:
| Device | ✅ Normal image size | ❌ Compressed image size |
|---|---|---|
| iPhone 6 (2014) | 3456 x 2304 pixels | 346 x 204 pixels |
| iPhone 13 (2021) | 4032 x 3024 pixels | 403 x 302 pixels |
| Xiaomi 12T Pro (2022) | 16384 x 12288 pixels | 819 x 614 pixels |
Don't edit or draw over the image
| ❌ Wrong: draw over image | ✅ Correct: non-altered image |
|---|---|
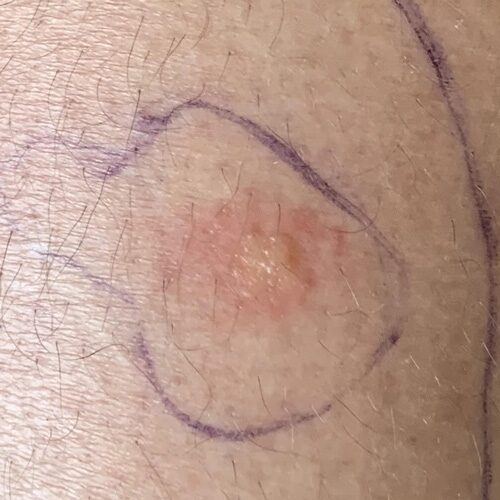 | 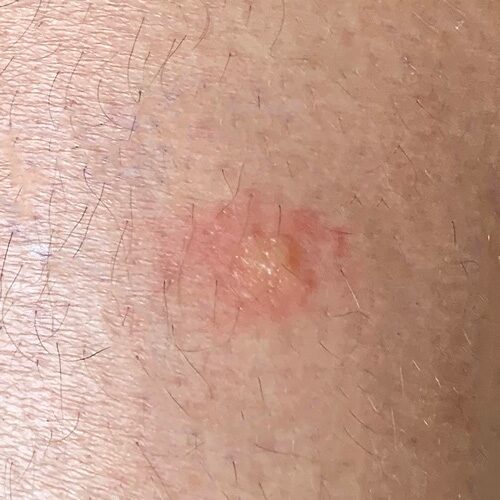 |